For many children the problem with a garment is not the fabric at all but the way it is put together: a ridge of thread along the side, a stiff label at the neck, a seam sitting exactly where a backpack strap presses. Knowing what to look for makes it much easier to spot trouble before it reaches your child's skin.
How to inspect a garment
Turn the garment inside out. This is the side your child lives with, and it often looks very different from the outside. Run your fingertips slowly along every seam, then along the neckline, cuffs and hem. Feel for raised ridges, loose thread ends, hard knots and any place where several seams meet in a lump, such as the underarm or crotch. Check for labels in the neck, side seam and waistband, and for small hanging loops or brand flags stitched into seams.
It helps to think about where pressure falls. A seam that feels minor in your hand can be very noticeable on a shoulder carrying a school bag, along a hip when your child sits on the floor, or at the waist when they bend.
The three seams you will see most
Overlock seams
The overlock, sometimes called a serged seam, is the most common seam in knitwear. A machine stitches the two layers together, trims the edges and wraps them in looping thread in one pass. The result is strong and stretchy, but on the inside it forms a raised, slightly bulky ridge with a row of thread loops. Thicker threads and heavier fabrics make that ridge more pronounced.
Flatlock seams
In a flatlock seam the fabric edges sit side by side rather than stacked, joined by threads that cross over the join. The seam lies almost flat on both faces, which is why it is popular in base layers, sportswear and some underwear. The stitching is visible on the outside as a decorative ladder. For children who feel seams, flatlock is often the most comfortable option, though a few still notice the thread texture.
Coverstitch
Coverstitch is mainly used for hems, necklines and binding. From the outside you see two or three neat parallel rows of stitching; on the inside a looping thread covers the raw edge. A well-made coverstitch hem is smooth, though the looping can feel slightly textured, and it adds a little firmness at cuffs and hems.
Other details worth noticing
Many tees have neck tape, a strip of fabric sewn over the back neck seam to cover it. Soft tape helps; a stiff or scratchy tape can make things worse. Bound seams, where a strip of fabric wraps the raw edge, are found in some woven garments and are generally smoother than an exposed edge. On woven shirts and trousers, a flat-felled seam encloses the raw edges inside a folded seam stitched down twice, which is tidy but can feel thick.
Where seams sit on the body
Seam placement is as important as seam type. A few patterns to look for:
- Shoulders. A standard tee has a seam running along the top of the shoulder, right under a bag strap. Raglan sleeves, which run diagonally from the underarm to the neckline, move that seam away from the top of the shoulder. Dropped shoulders place the seam lower down the arm.
- Sides. Some knitwear is made from a tube of fabric with no side seams at all. For children who notice seams when sitting or lying on their side, tubular bodies can make a real difference.
- Underarms. Where the sleeve and side seams meet, a junction of thread and folded fabric can rub. A slightly roomier sleeve reduces that friction.
- Crotch and inside leg. In leggings and trousers, look for a gusset or a seam junction that is well flattened rather than a hard knot of layers.
Fit affects seams too. A top that is too small pulls seams tight against the skin, while one that is far too big lets seams shift around and brush unpredictably. If you are unsure about sizing, the kids' size and fit guide explains how to measure.
Wearing clothes inside out
Many children solve the seam problem on their own by wearing clothes inside out, and it is a perfectly reasonable choice. The seams, labels and loops all end up on the outside, and the smoother face of the fabric sits against the skin. At home, at the park or for sleep, it costs nothing. Some families buy plain pieces in solid colours precisely because they look much the same either way round.
If inside-out wearing is not practical for school or outings, take note of which seams your child is escaping. That tells you exactly which construction details to prioritise next time you shop.
Tagless and heat-transfer labels
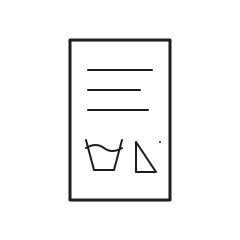
Many children's clothes now carry the care and size information printed directly on the fabric instead of on a sewn tag. Usually this is done with a heat-transfer label, a thin printed film pressed onto the inside of the neck or waistband. These are a big improvement for most children, but they are not completely invisible. A transfer can feel slightly smooth, plasticky or warm compared with the surrounding fabric, and older ones can crack or peel at the edges after many washes. If your child still fusses at the back of the neck in a "tagless" top, the transfer may be why.
Ink stamped straight into the fabric is usually the least noticeable option. Feel the label area on the inside: if you cannot tell where it begins, your child probably cannot either.
Removing sewn tags safely
Cutting a tag off with scissors seems quick, but it usually leaves a short, stiff stub with sharp corners, which can be more irritating than the original label. Unpicking is far kinder.
- Before you start, take a photo of the label so you keep the size, fibre content and washing instructions.
- Turn the garment inside out and find the line of stitching holding the label in place.
- Use a seam ripper or small, sharp embroidery scissors to cut a few stitches at a time, working from one end.
- Gently pull the label free and pick out loose thread ends with tweezers.
- If the label is caught inside a structural seam, such as a side seam, cut only the label's own stitching and leave the seam stitches intact. If you cannot separate them, trim the label as close as possible and then soften the edge by rolling it between your fingers.
- Check that the seam is still secure. A couple of hand stitches will close any small gap.
Some clothes have a stack of labels in the side seam, often several layers of satin or nylon in different languages. These can be bulky and slippery, and the same unpicking approach applies. For the softer staples that make up most of a child's week, our guide to everyday kids' basics has more on what to keep in rotation, and the companion page on fibres and knits that feel gentle covers the other half of the comfort equation.
This guide is general information about clothing comfort and fit. It is not medical advice and is not a treatment for any condition. Every child is different. If clothing causes persistent or severe distress, talk to your child’s doctor or an occupational therapist.